Finishing Mitered Veneers
The mitered veneers come out of the jig in 2 separate pieces. The machined edge is sharp & clean. Lay the two pieces side-by-side with the sharp edges butted together. Apply a length of painter's tape to the back. This acts as a hinge, allowing you to fold the veneers into the 90 degree angle necessary to fit the V-groove in the forearm. No fixture is necessary since the angle is correct & it naturally folds into a perfect right angle. Apply a few windings of tape to hold the assembled veneers in position until your glue sets.

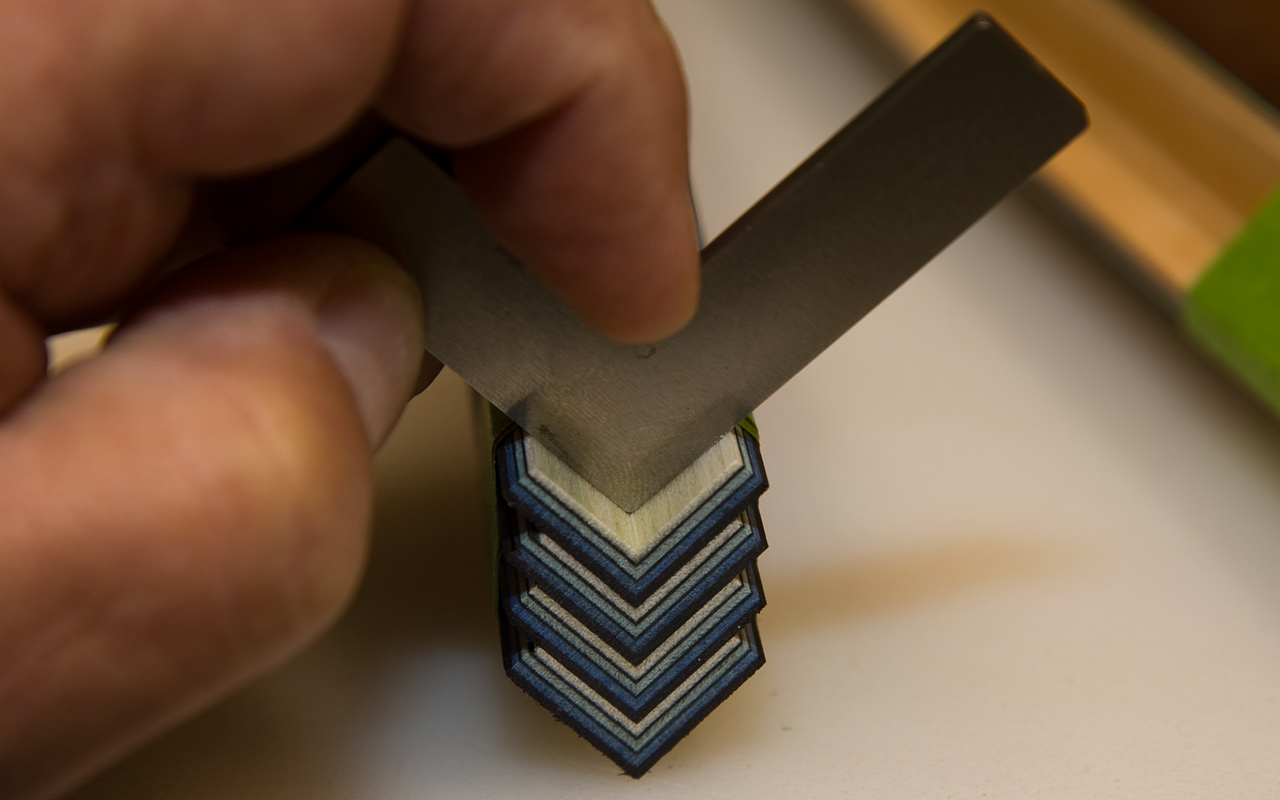
Once the glue has set, you can clean up the ends & the edges prior to removing the excess stock.
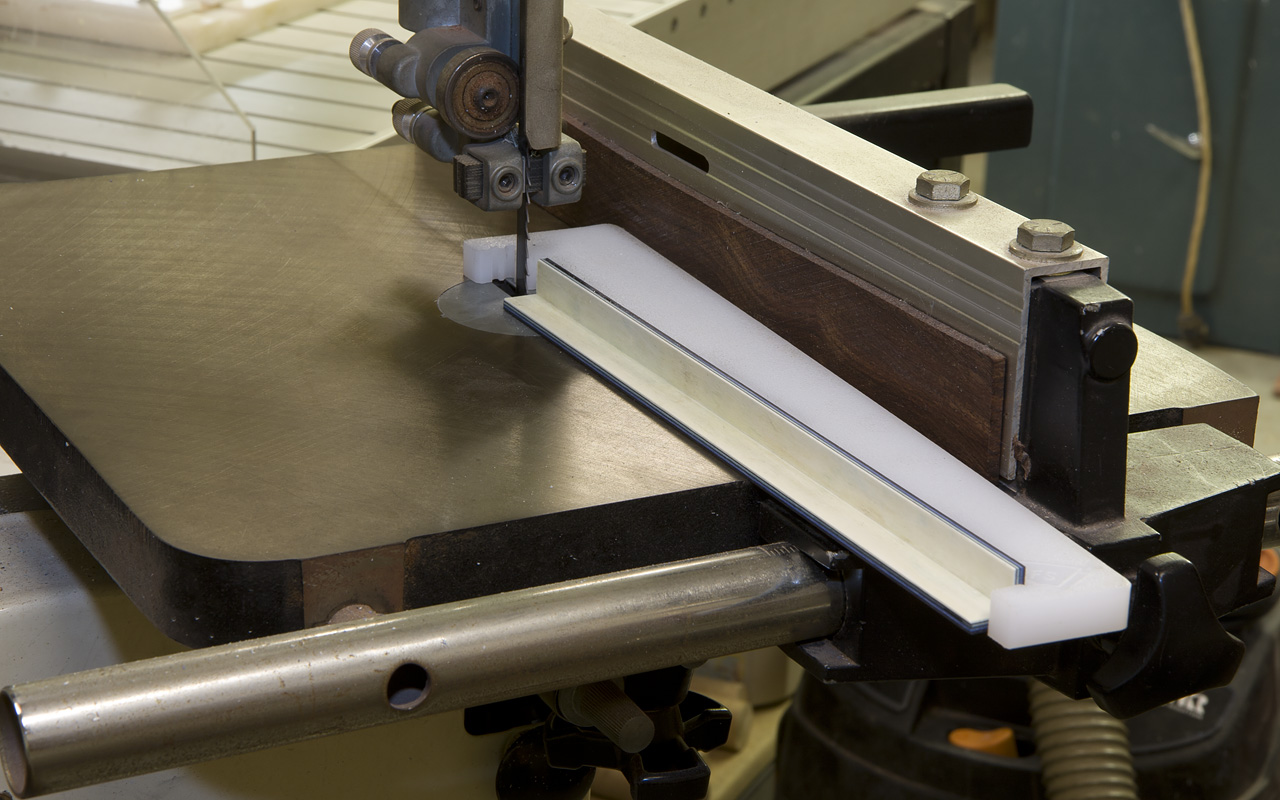
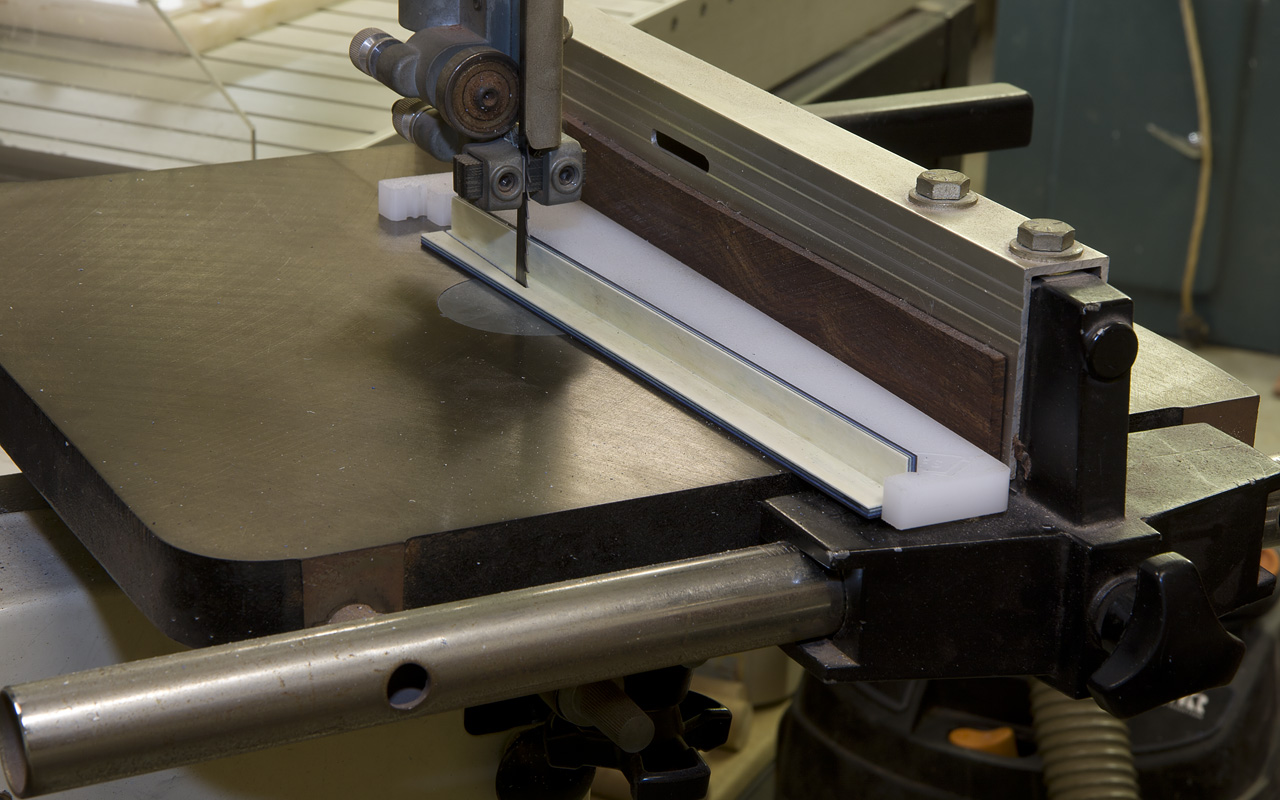
I use another jig to trim the excess material from the veneers. It's shown here cutting the first side. It will then be flipped over, the fence readjusted and the second side cut to match.


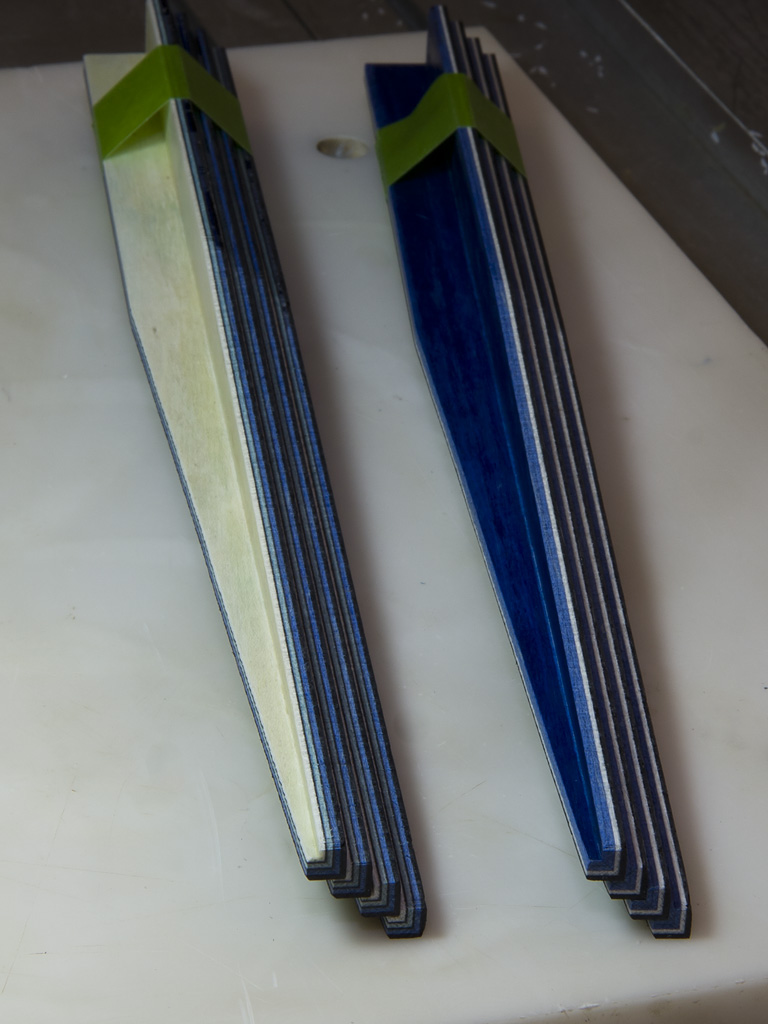
One side finished on the left...both sides done on the right.
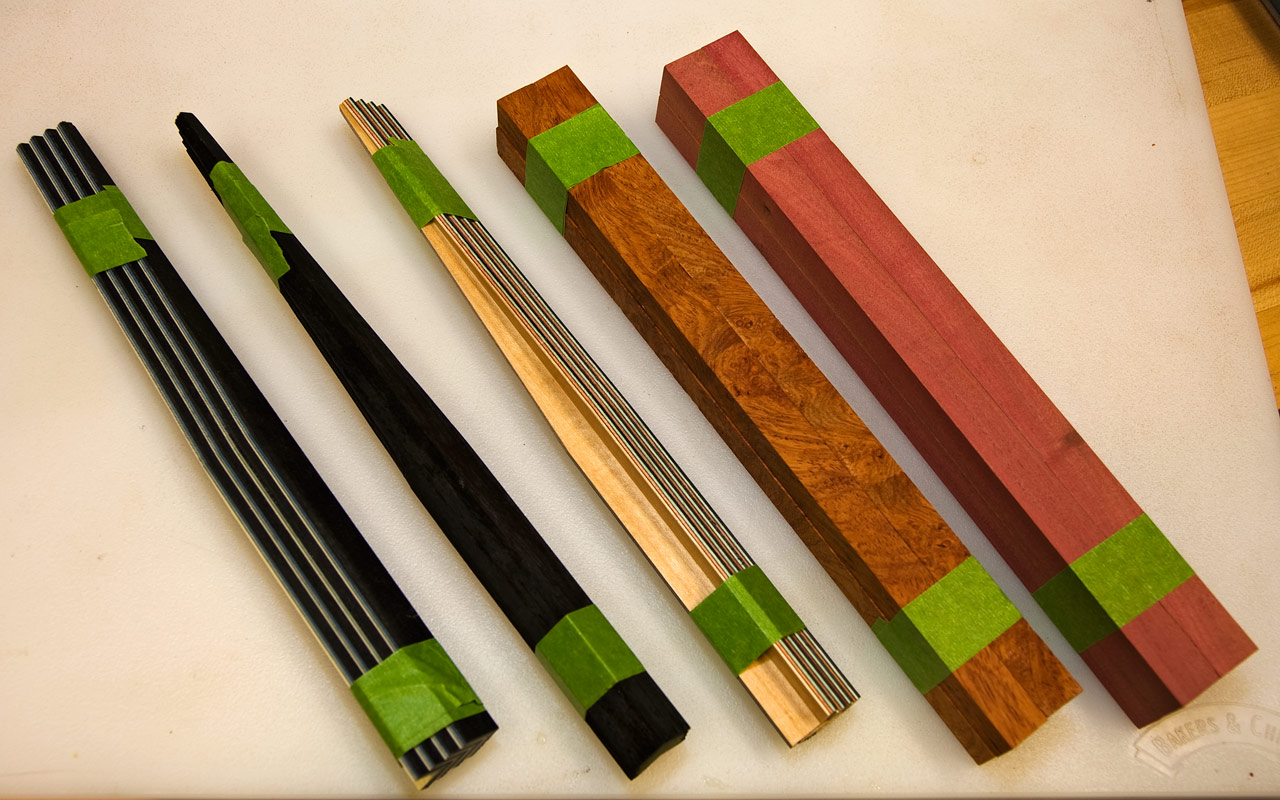
Two sets of veneers, ready to be installed.
-----------------------------------------------------
**
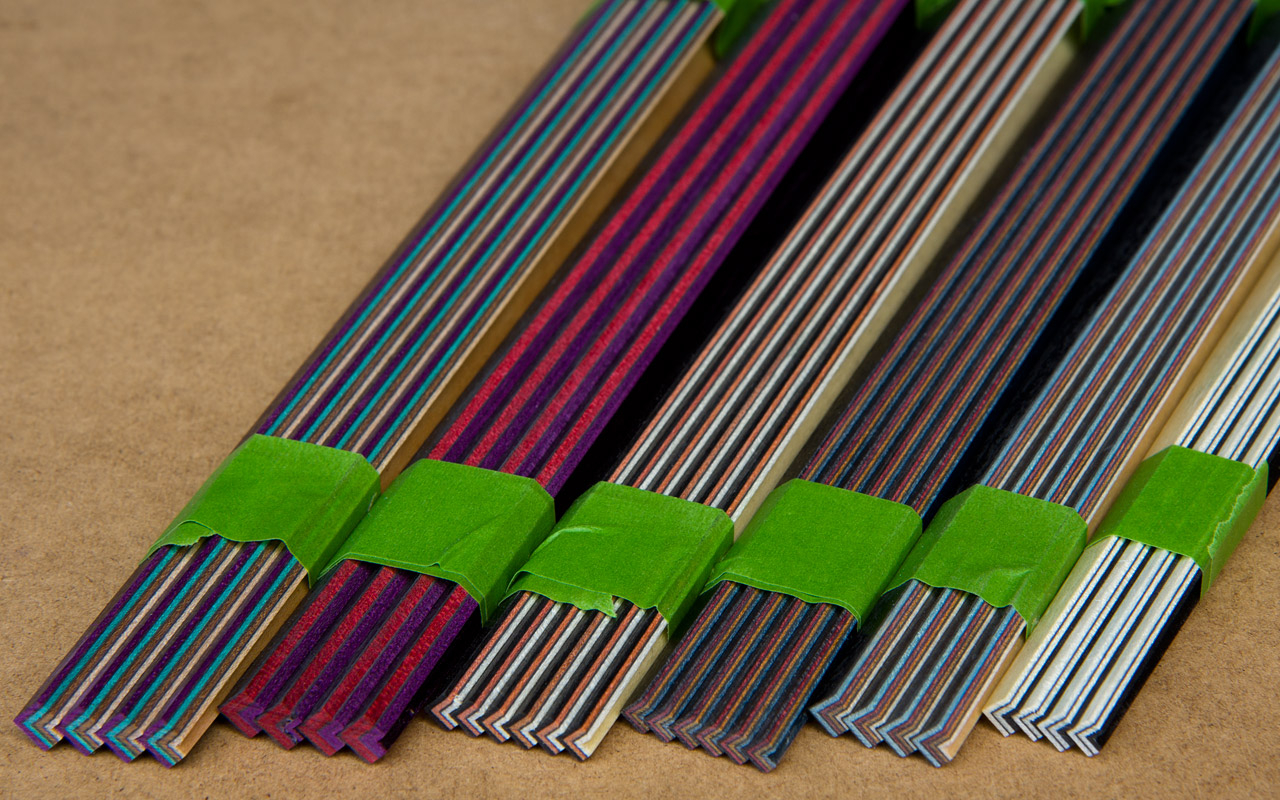 **
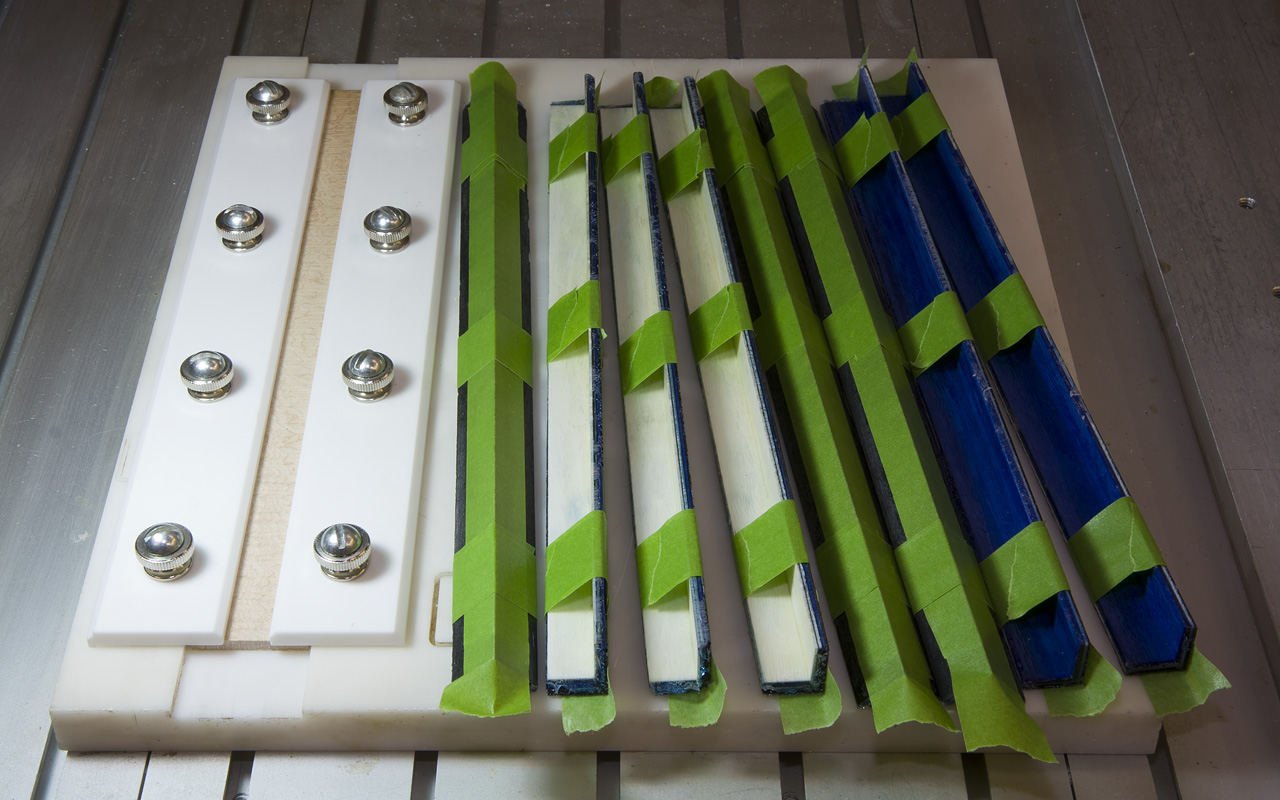
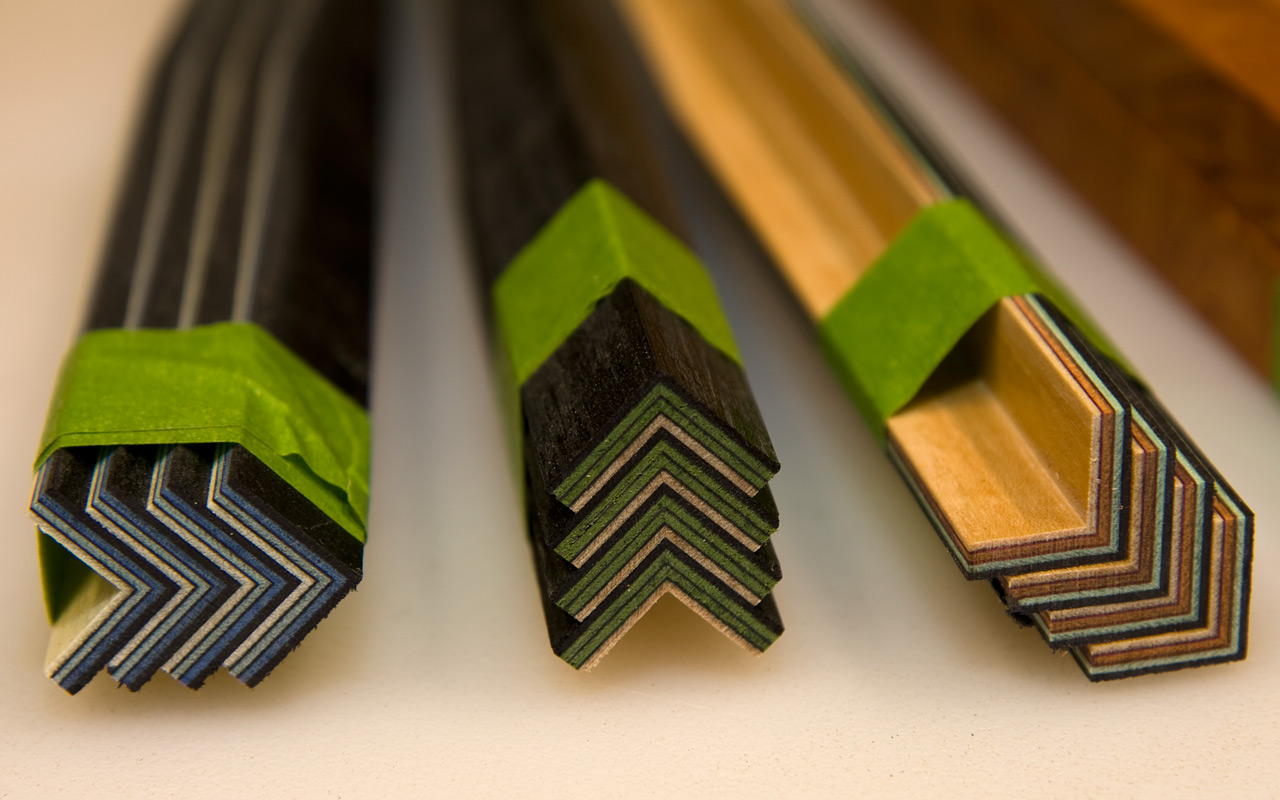
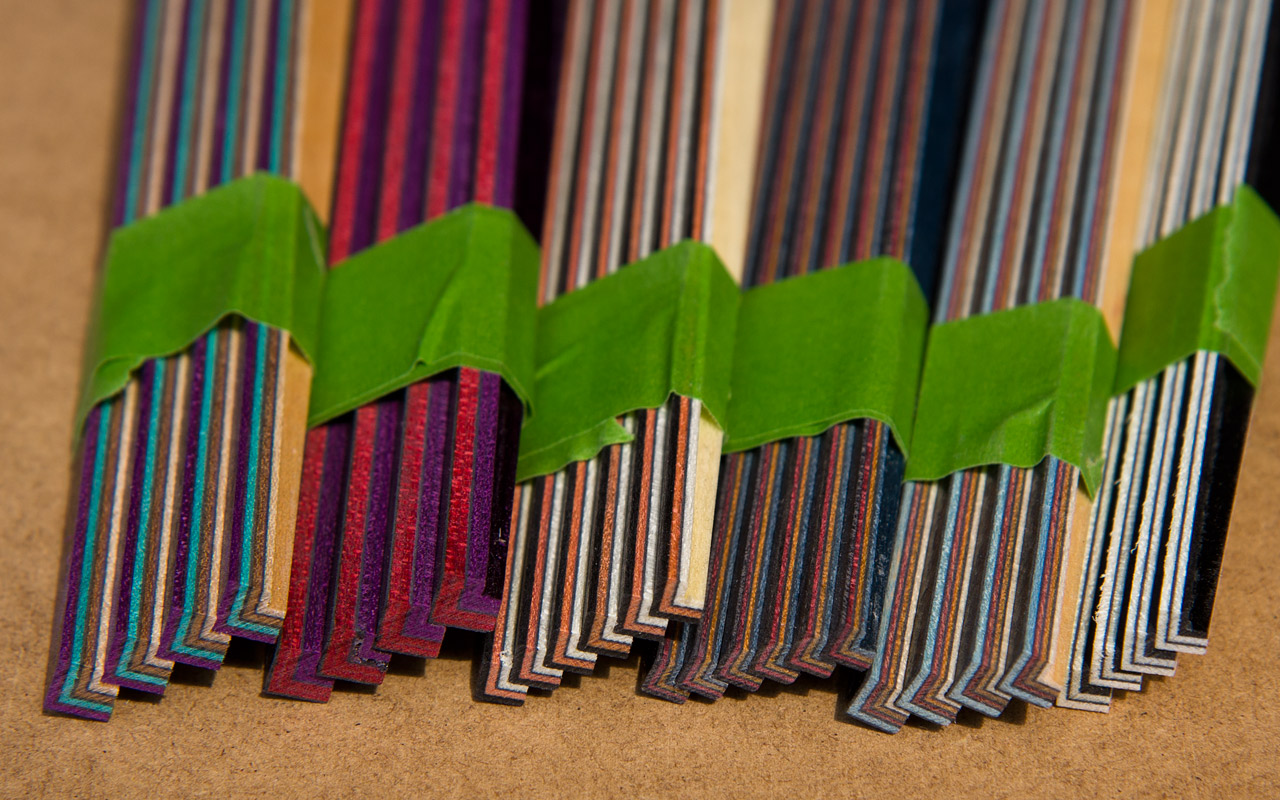
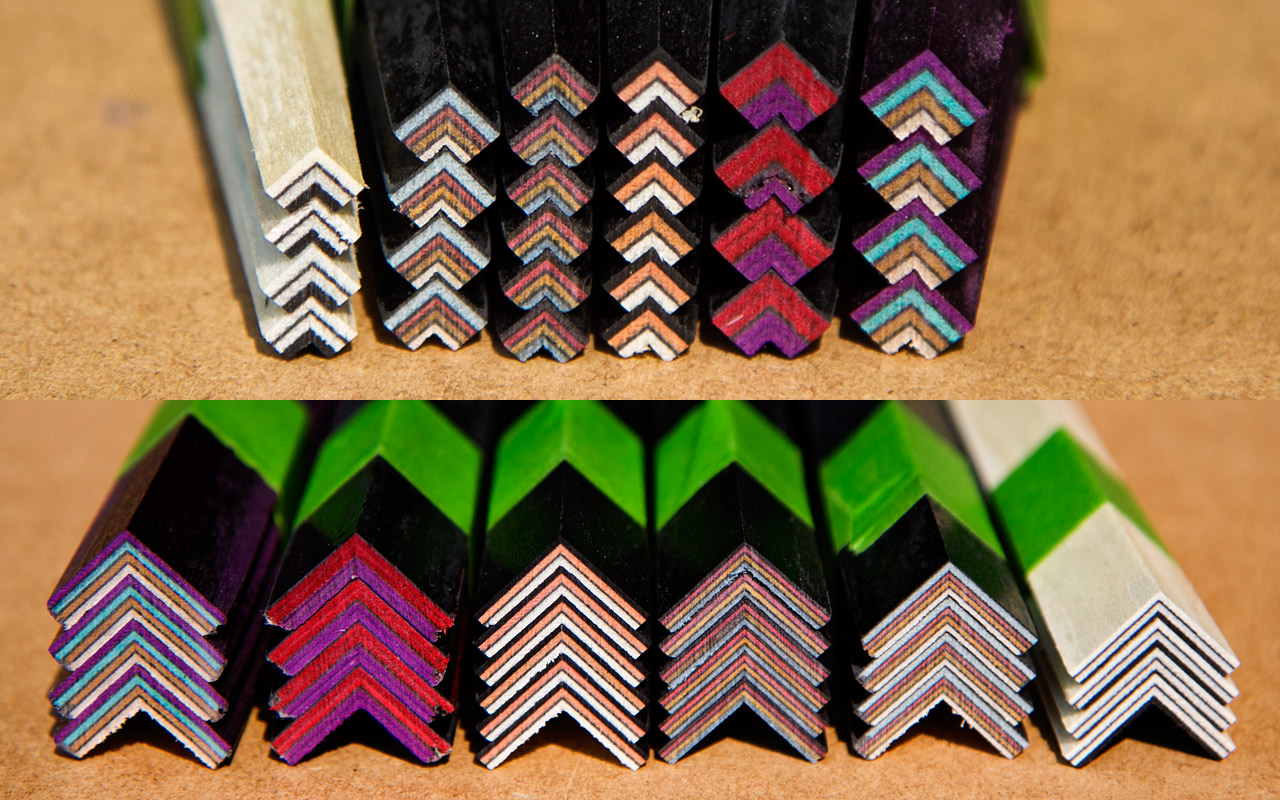
**A few more pics showing some finished veneers, ready for assembly.


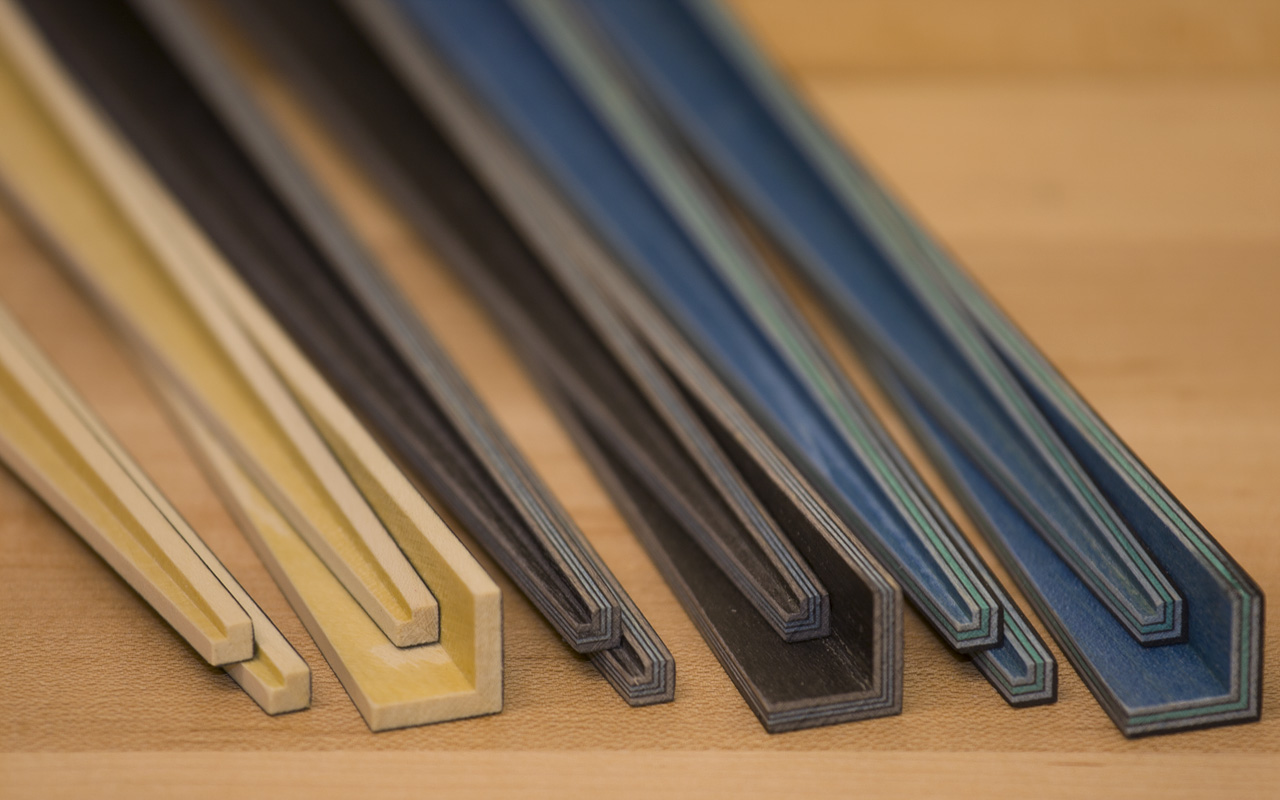
And a look at some components, before & after assembly.
You might want to check out the forearm page to see how the above veneers look installed in a forearm.